
Set Default Value in Epicor®
One of the most common requests we get from customers is how to set a default value on a field in Epicor®. Below is a simple example of how to set the default value on a customer field called Source. This process is fairly simple and works for almost any field.
In my example the source field is a user-defined field in the customer table called Character10. Prior to this example I setup user codes and tied the user codes to this field.
To set a default value, you use a BPM. Open Epicor® and navigate to System Management -> Business Process Management -> Setup -> Method Directives
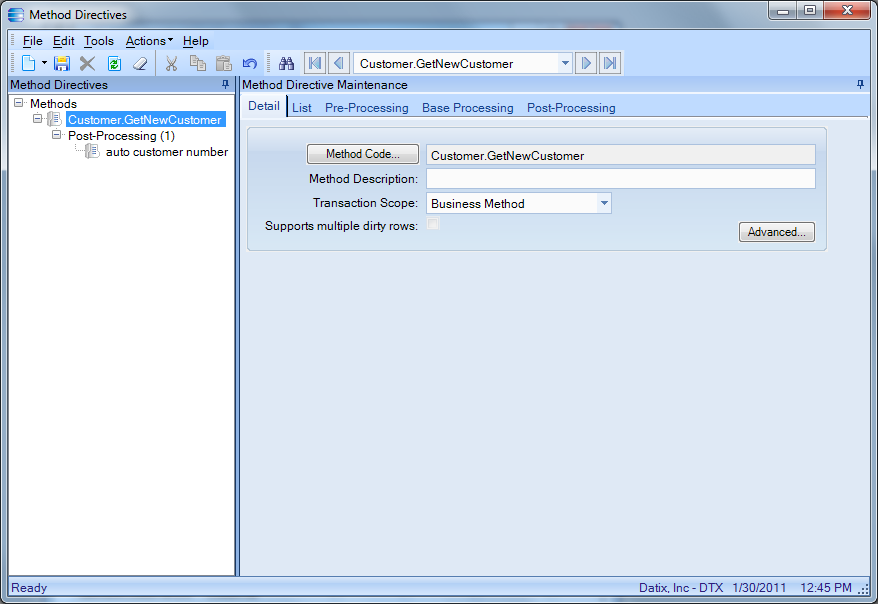
1. Choose Customer from the business object drop down and type GetNew in the method name box. Choose GetNewCustomer from the search results
 BPM Search
2. After selecting that method your screen should look like this:
 Customer BPM view
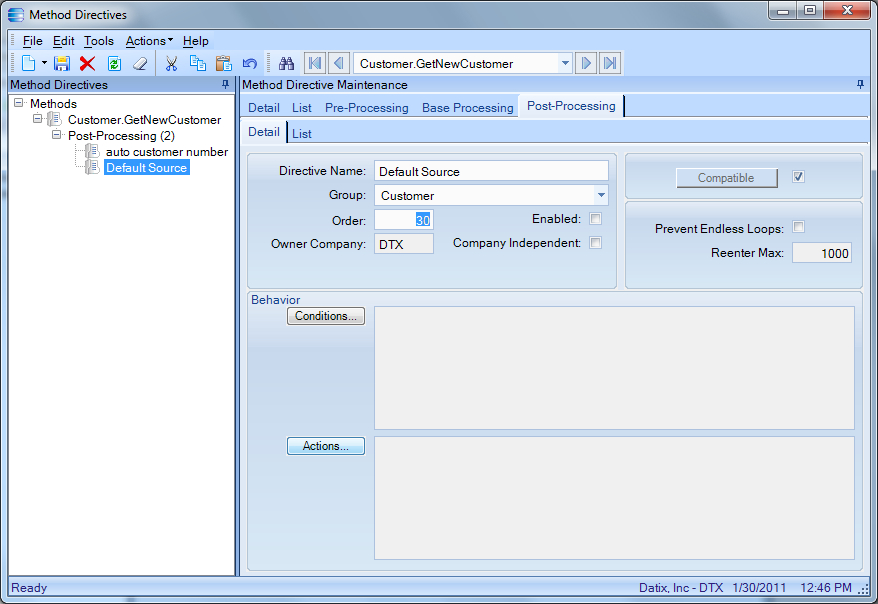
3. Next enter Default Source in the directive name box, and Customer in the group box. The group allows you to easily find and group together BPMs.
 Customer BPM Setup
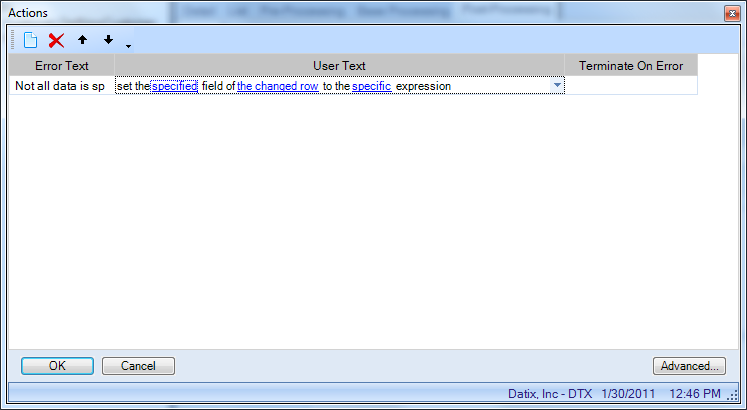
4. Next click on Actions, then click the new icon. Next choose “set the specified field of the changed row to the specified expression” from the User Text drop down list.
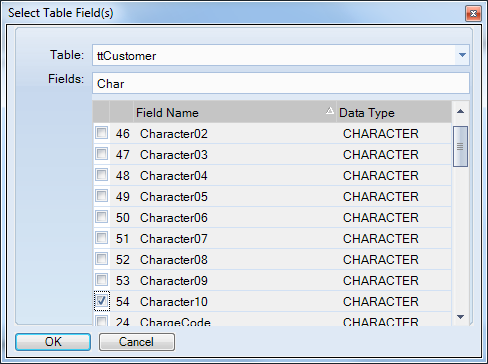
5. Click on “specified” to choose the field you want to change. Choose ttCustomer from the table list then click the check box next to Character10 and click OK.
6. Next click specific and enter the default value.
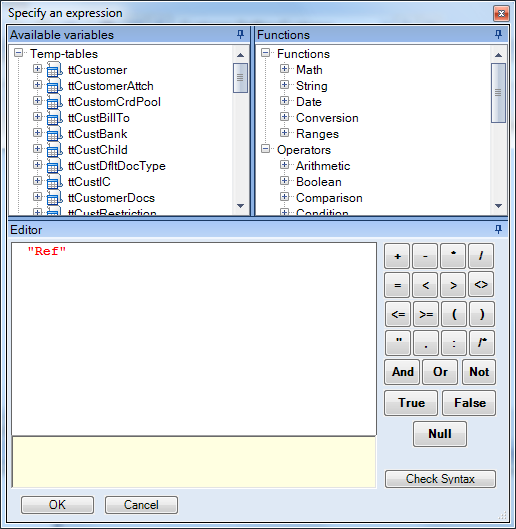
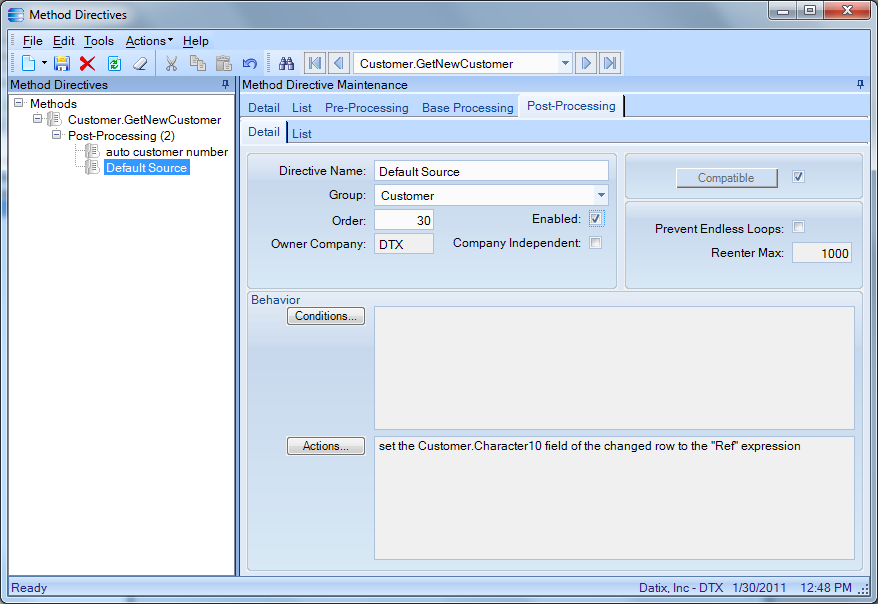
7. Now your actions screen should look like the following. Click Ok.
 Customer BPM view
8. The BPM screen should look like the following. Check the enabled box and click save. Next time you create a new customer record you will see the default value in the Character10 field.
Wrap Up
If you’d like more help with Epicor®, please contact us today! Datix knows ERP inside and out.