How to Upload Data using Epicor® DMT
Epicor® DMT (Data Management Tool) is an upload tool developed by Epicor®. It is ideal for any Epicor® ERP user who wants to upload data directly into Epicor®. You may be migrating your data from a previous version of Epicor® or to Epicor® for the first time from another system.
When uploading data into Epicor®, it is important to be aware that Epicor® ERP is built off of tables that have very specific relationships to each other. So in DMT, each screen references a different table or mixes of tables. Because of this you will have to upload data in a certain order because some screens are dependent on others. For example, you have to upload a customer file before you can add a customer’s alternative bill-to address.
Example: Customer Upload
In this example, I will be showing how to do a customer upload. This is helpful anytime you need to update your existing customer records or add new customers.
Step 1: Table Creation
Table creation must happen before you upload anything.
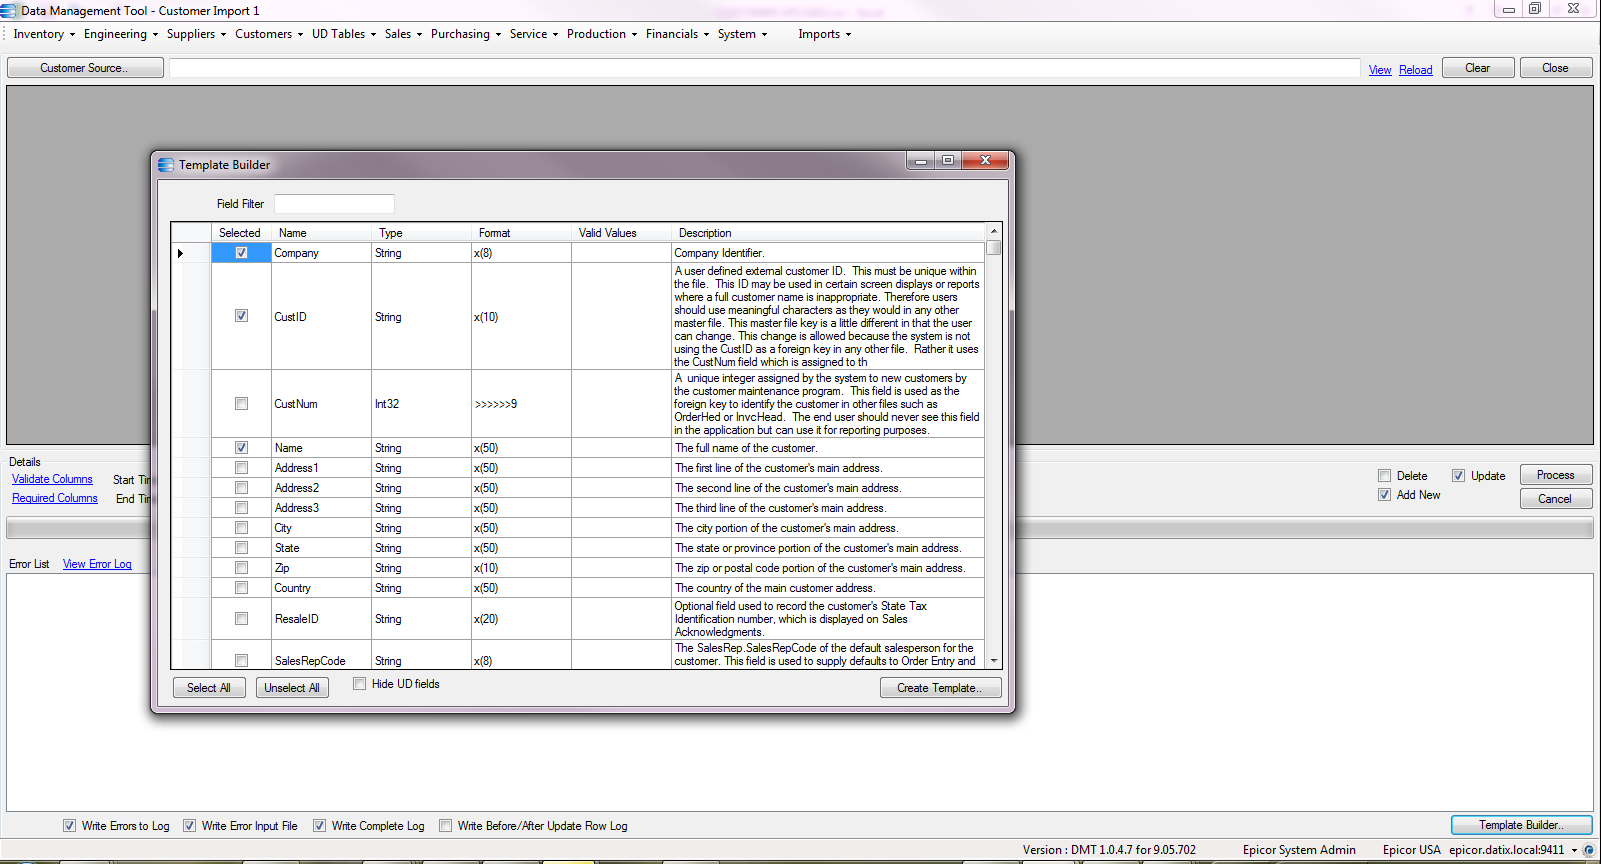
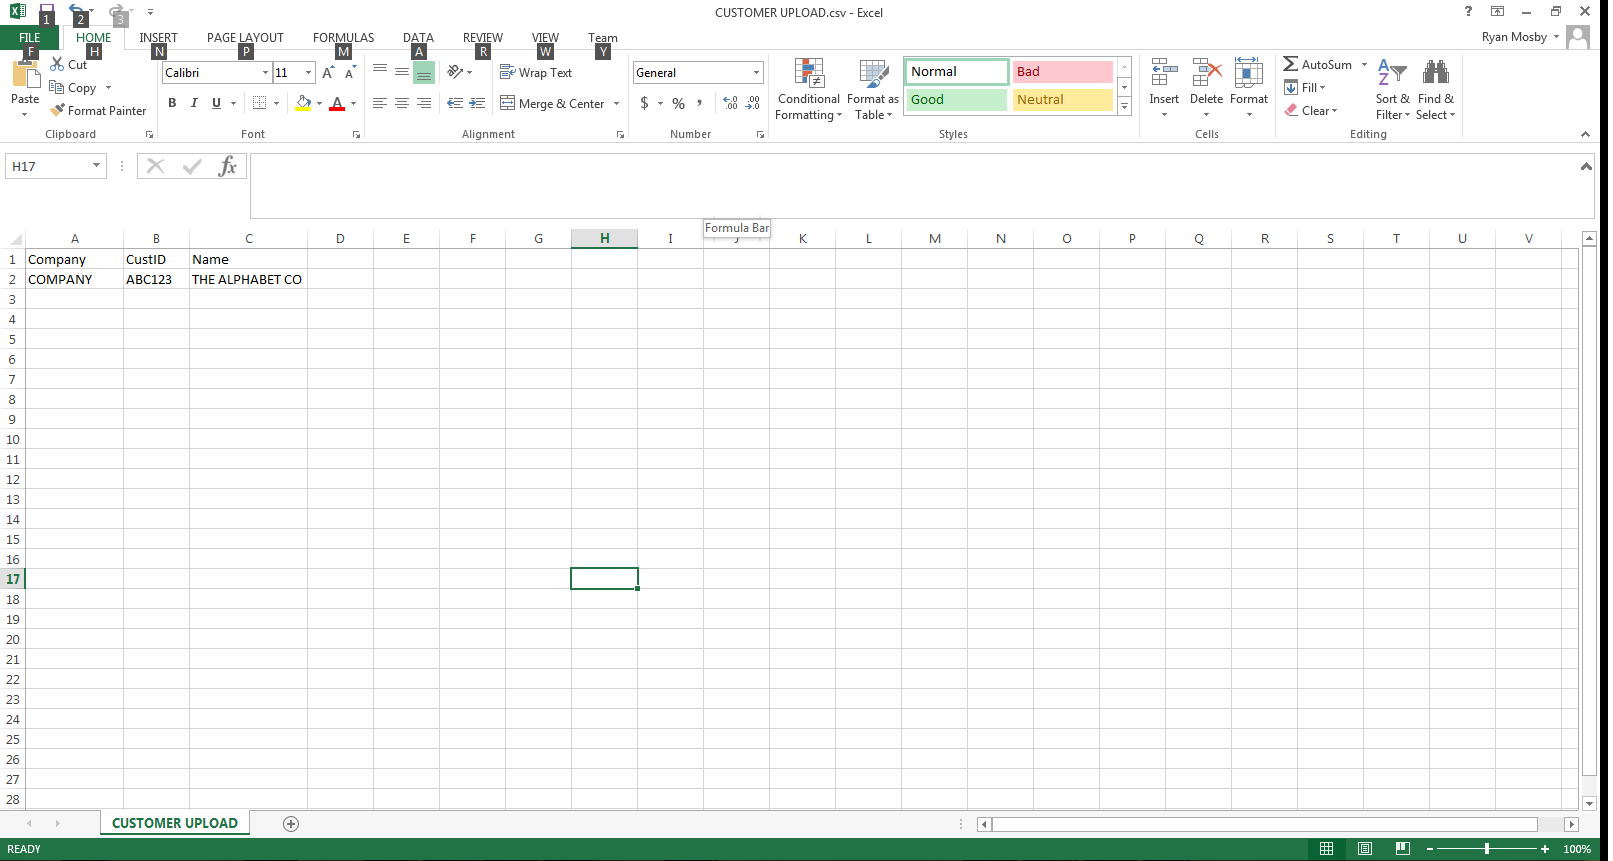
Build your table by clicking on the template builder button on the bottom right hand side of the screen. A screen will prompt you to select additional fields. Click the check boxes to select additional fields. The required fields (columns) are already selected when you open the template builder. After you have what you want selected hit create template. A .csv will open. This is just a template without any data — yet.
Note: you don’t have to use the template builder, you can add the column headings to your own data. But the template builder is convenient because it has definitions for every field. This helps you know what Epicor® tracks.
Step 2: Add your data to your .csv file
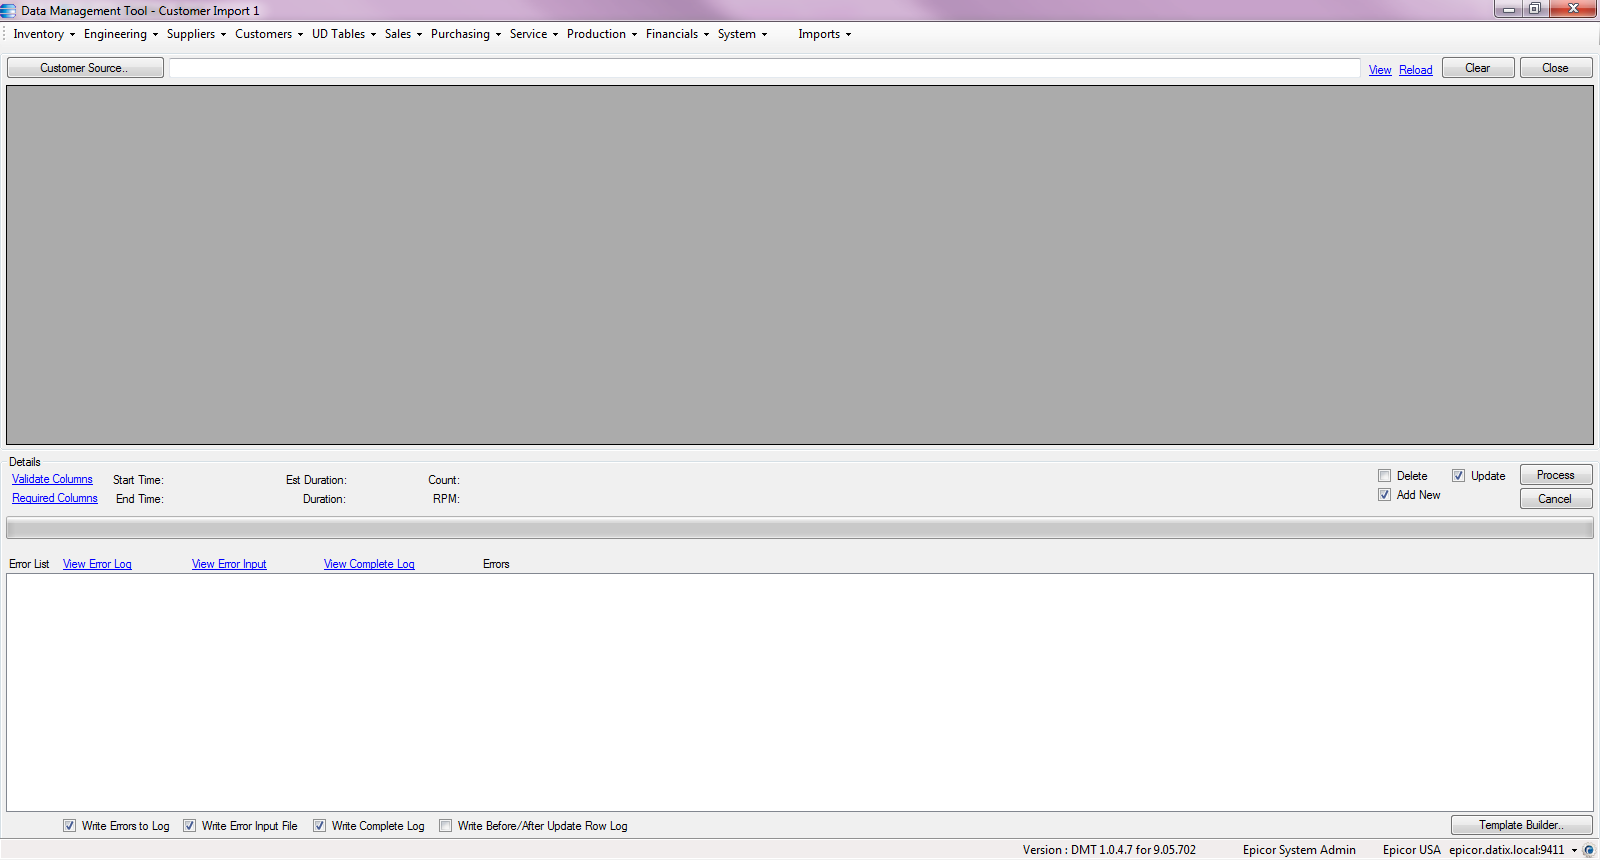
After you have your data prepared, click on the Customer Source button then select your table. You can select various file types depending on how your data is structured. A .csv is recommended because it is easy to work with. A window will pop up and you will select your named file, in this example Customer Upload. The table will populate in the gray preview pane. I recommend checking the count. It shows you how many rows have been imported. This is used to validate that every row of data is showing up correctly. The required columns button is a hyperlink with pop up prompt box of the required fields. Then hit the hyperlink validate columns. This checks two things. One that all the required columns are there and two, that all columns present do not have any errors. If you have errors they will populate in the large white box below the data preview area. For this case, we do not have any errors and a good to move on to the next step.
Step 3: Check the boxes
Your options include: delete (if the data you have in the table is present in Epicor®, it will be deleted out of Epicor®), add new (add a new line of data), and update (if checked will find that primary key and update anything associated with the primary key).
Step 4: Click the process button
Can be clicked again to pause the upload. Cancel will kill the whole upload. You will be prompted to delete the errors associated with the source. Hit yes to continue with the upload.
Other options while in this view:
- Write errors to log – Whenever an inputted data contains an error, Epicor® will fire off an error message, which is then put in a file contained in a document will all the errors logged.
- Write error input file – Epicor® takes the input (that was attempted to be uploaded) and puts that in a .csv file. After the upload you will have a file full of lines that didn’t get processed so you know exactly what to fix.
- Write complete log – Gives you stats on the upload. It tells you the date and time uploaded, the speed of the upload. This is a file of everything that has been uploaded into Epicor®.
- View – Re-opens your source .csv file and there you can edit your .csv file and save it and press the reload button. It will take the new version.
- Clear – Clears your table preview.
Step 5: Success!
Your data runs and is directly uploaded into Epicor®.
More questions about Epicor®? Contact an expert at Datix today!


